Yesterday I tried a new technique while wire wrapping. For most of my pieces I start by cutting four one-foot pieces of wire and connecting them at the very end to start my loop. I allow the loop to flow into the piece. The new technique I tried was very different. Luckily I remembered to capture my process for those of you who have been asking how to wire wrap.
Things to be aware of:
I learned through practice, through callusing my fingers, through messing up multiple times, through learning what works for me specifically. I do not believe art is something that can be "taught." Wire wrapping to me is about finding your "flow", finding your own technique, and finding your own style. In this tutorial I will be very brief because each stone is different. You must let the energy of the stone carry you throughout the artistic process. Wrapping should be like a puzzle - determining where to put each piece of wire, what weave will best lock the wires in place, etc. Without me being there with you to see the shape and size of the crystal, this is the best I can do. I truly hope this bit of information and these pictures are helpful!
Step One: Cut four long (16-24 inch) pieces of base wire. I use 16 gauge, but many people will use 18 or 20 (thinner sizes) for finer detail.
Step Two: Cut one very long piece of the thin wire you will be using for weaving. I usually cut a five foot strand, but end up needing more. I use 28 gauge wire for weaving, which is the thinnest I've been able to find. I love working with 26 gauge as well. 24 is normally too strong for attractive, tight weaves.
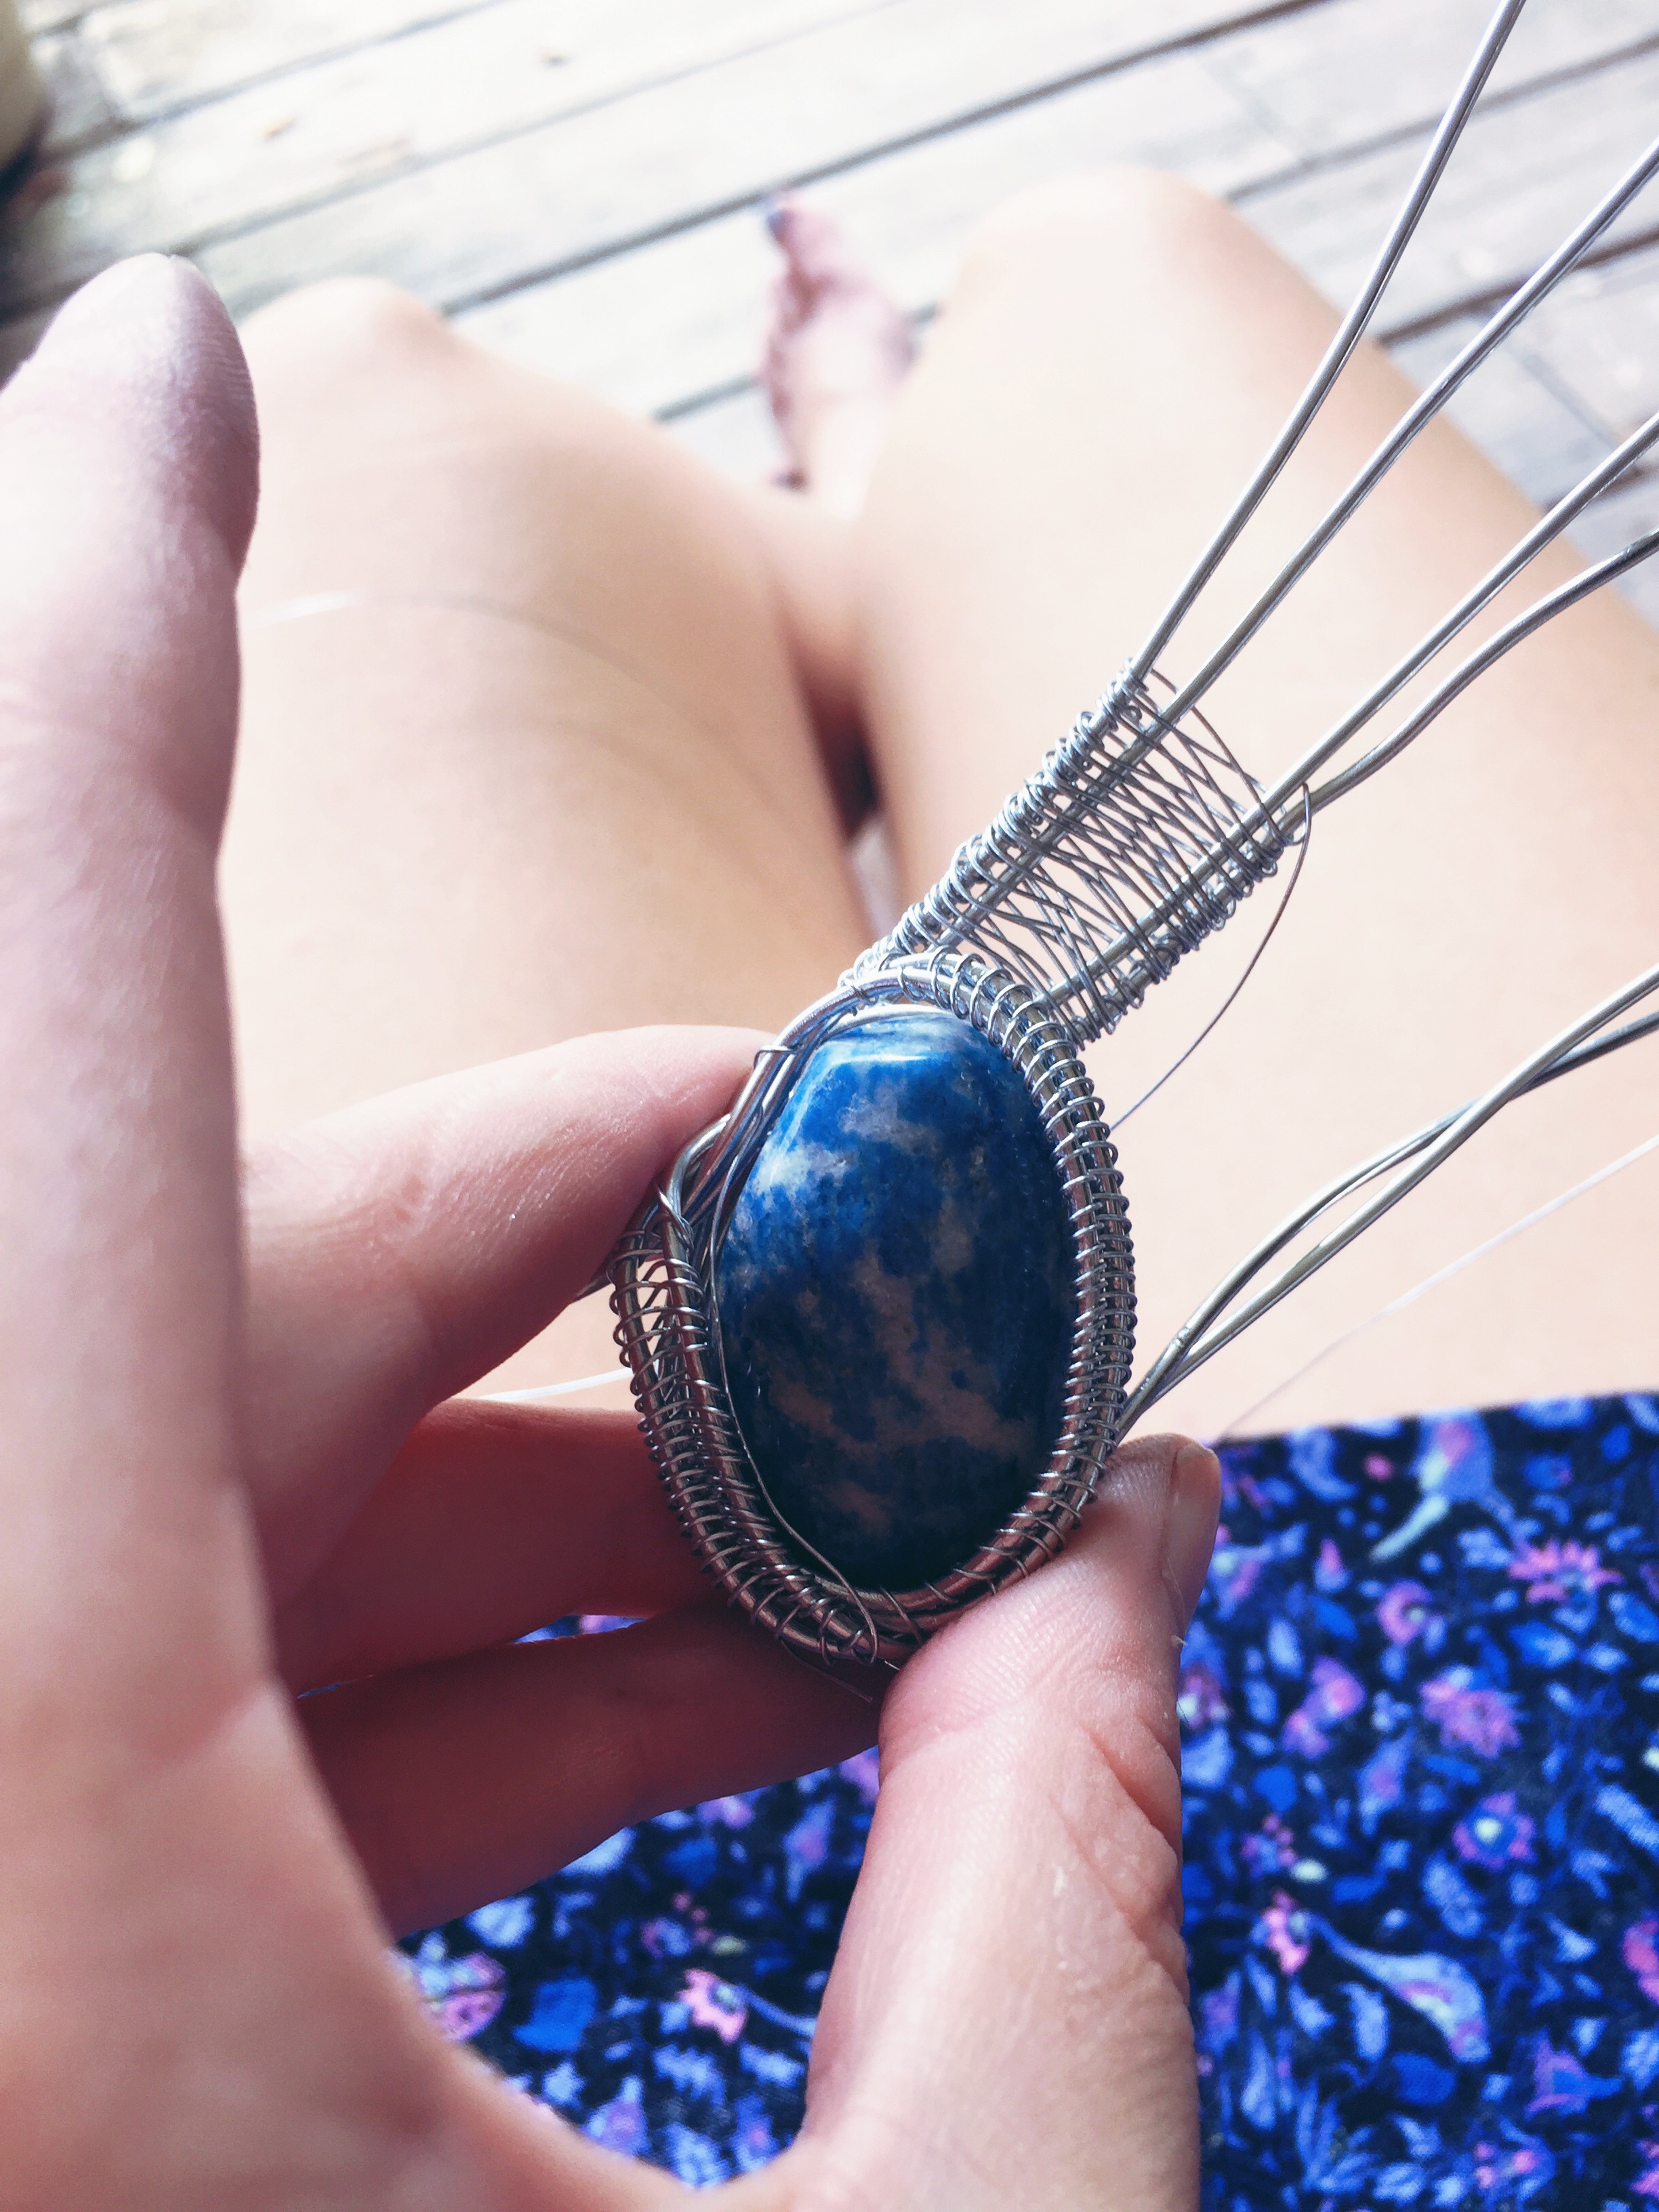
Step Three: Wrap the thin wire around the center of all four pieces so they stay together. From here you will begin your weave. This will be the bottom of the pendant.

The easiest technique in my opinion is to go over and under two pieces of wire with the thin wire. Make sure you are pulling the wire tight each time. With the thin wire start from the outside of the thicker piece, pull down into the middle, and pull out the other side, go over the outside piece of thicker wire, down into the middle, and out the other side. It is very basic weaving and after you learn this step, you will be on your way to playing around with other weaving styles.
Step Four: After you have began weaving this side of your wire base, hold it up to the stone how it will sit. See what your next move is. You should pay attention to how you are going to hold the stone in place, what wire will move behind the stone to create a cage, and how you will begin your loop.

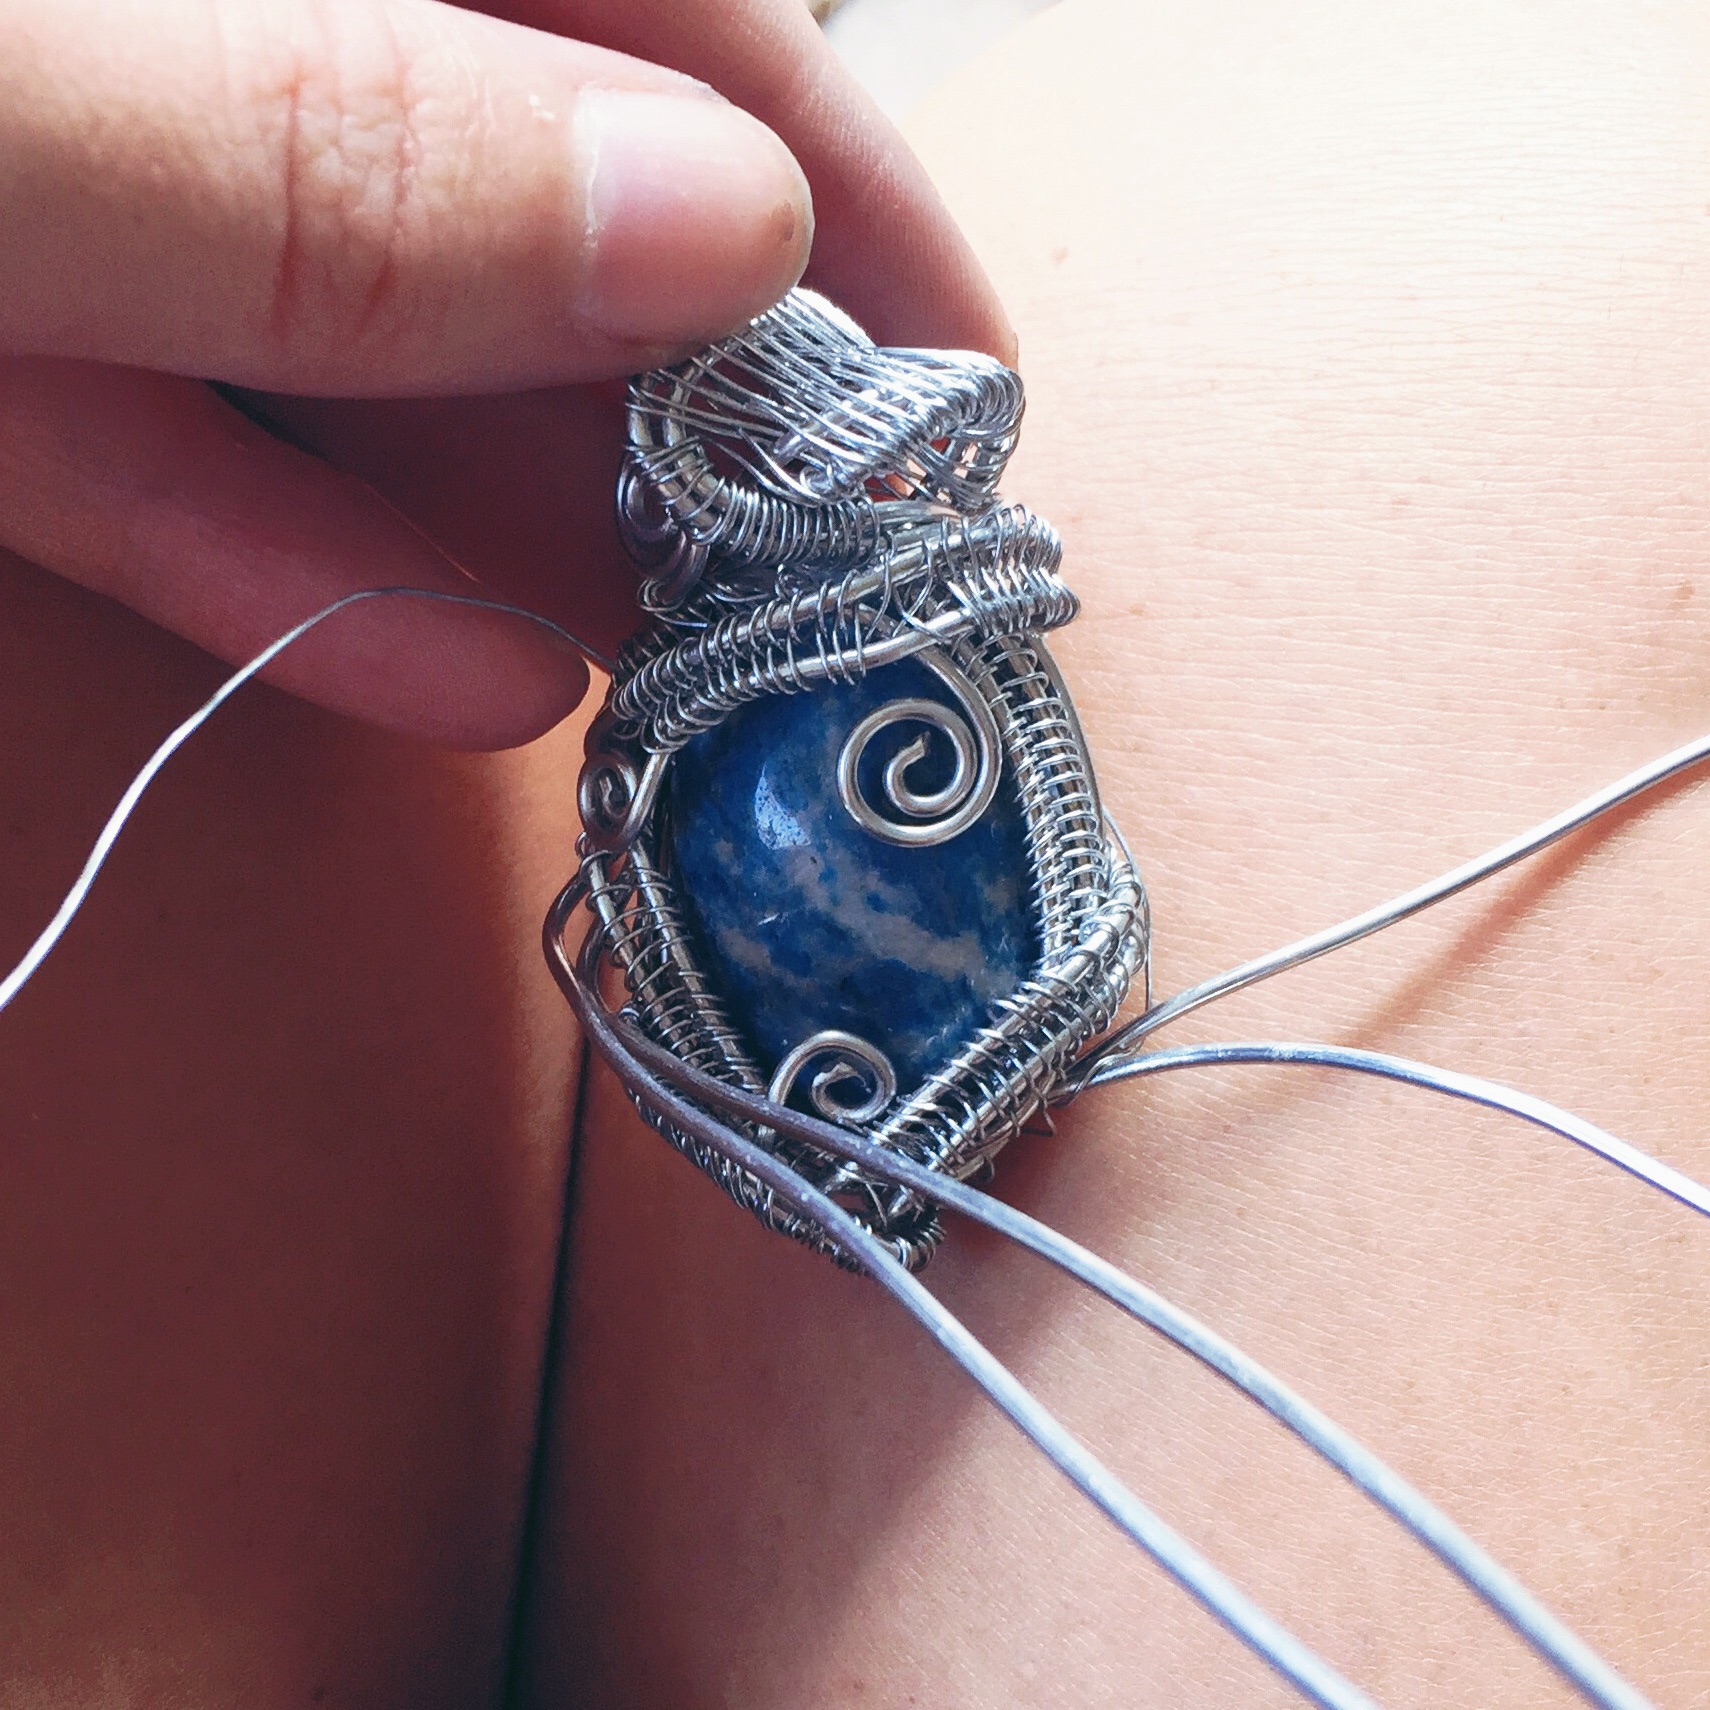
The loose ends that come up to the top do not have to continue to circle the stone, you can put those pieces of wire around to the back of the stone, come around the side, whatever feels right. Like I said before, wrapping is like a puzzle and should be done by finding where each piece goes until you have it in the right spot.
Step Five: Weave the other side of the base where you began your first weave (the bottom of the pendant. You can try a new weaving technique, use all four (or as many as you want) of the thick pieces of wire.
Do not worry if you mess up your weave. It can always be covered my swirls or more wire! :)
Step Six: Once you have been weaving for a while, hold the stone up again. Can you begin a loop? To create the loop, you will start from the back and put something between the stone and loop to make a hole. With that piece you will come around the front and find a way to assemble those pieces of wire so the loop will stay in place.

Step Seven: It helps lock the stone and wire in place if you come back up and wrap the loop with excess wire.
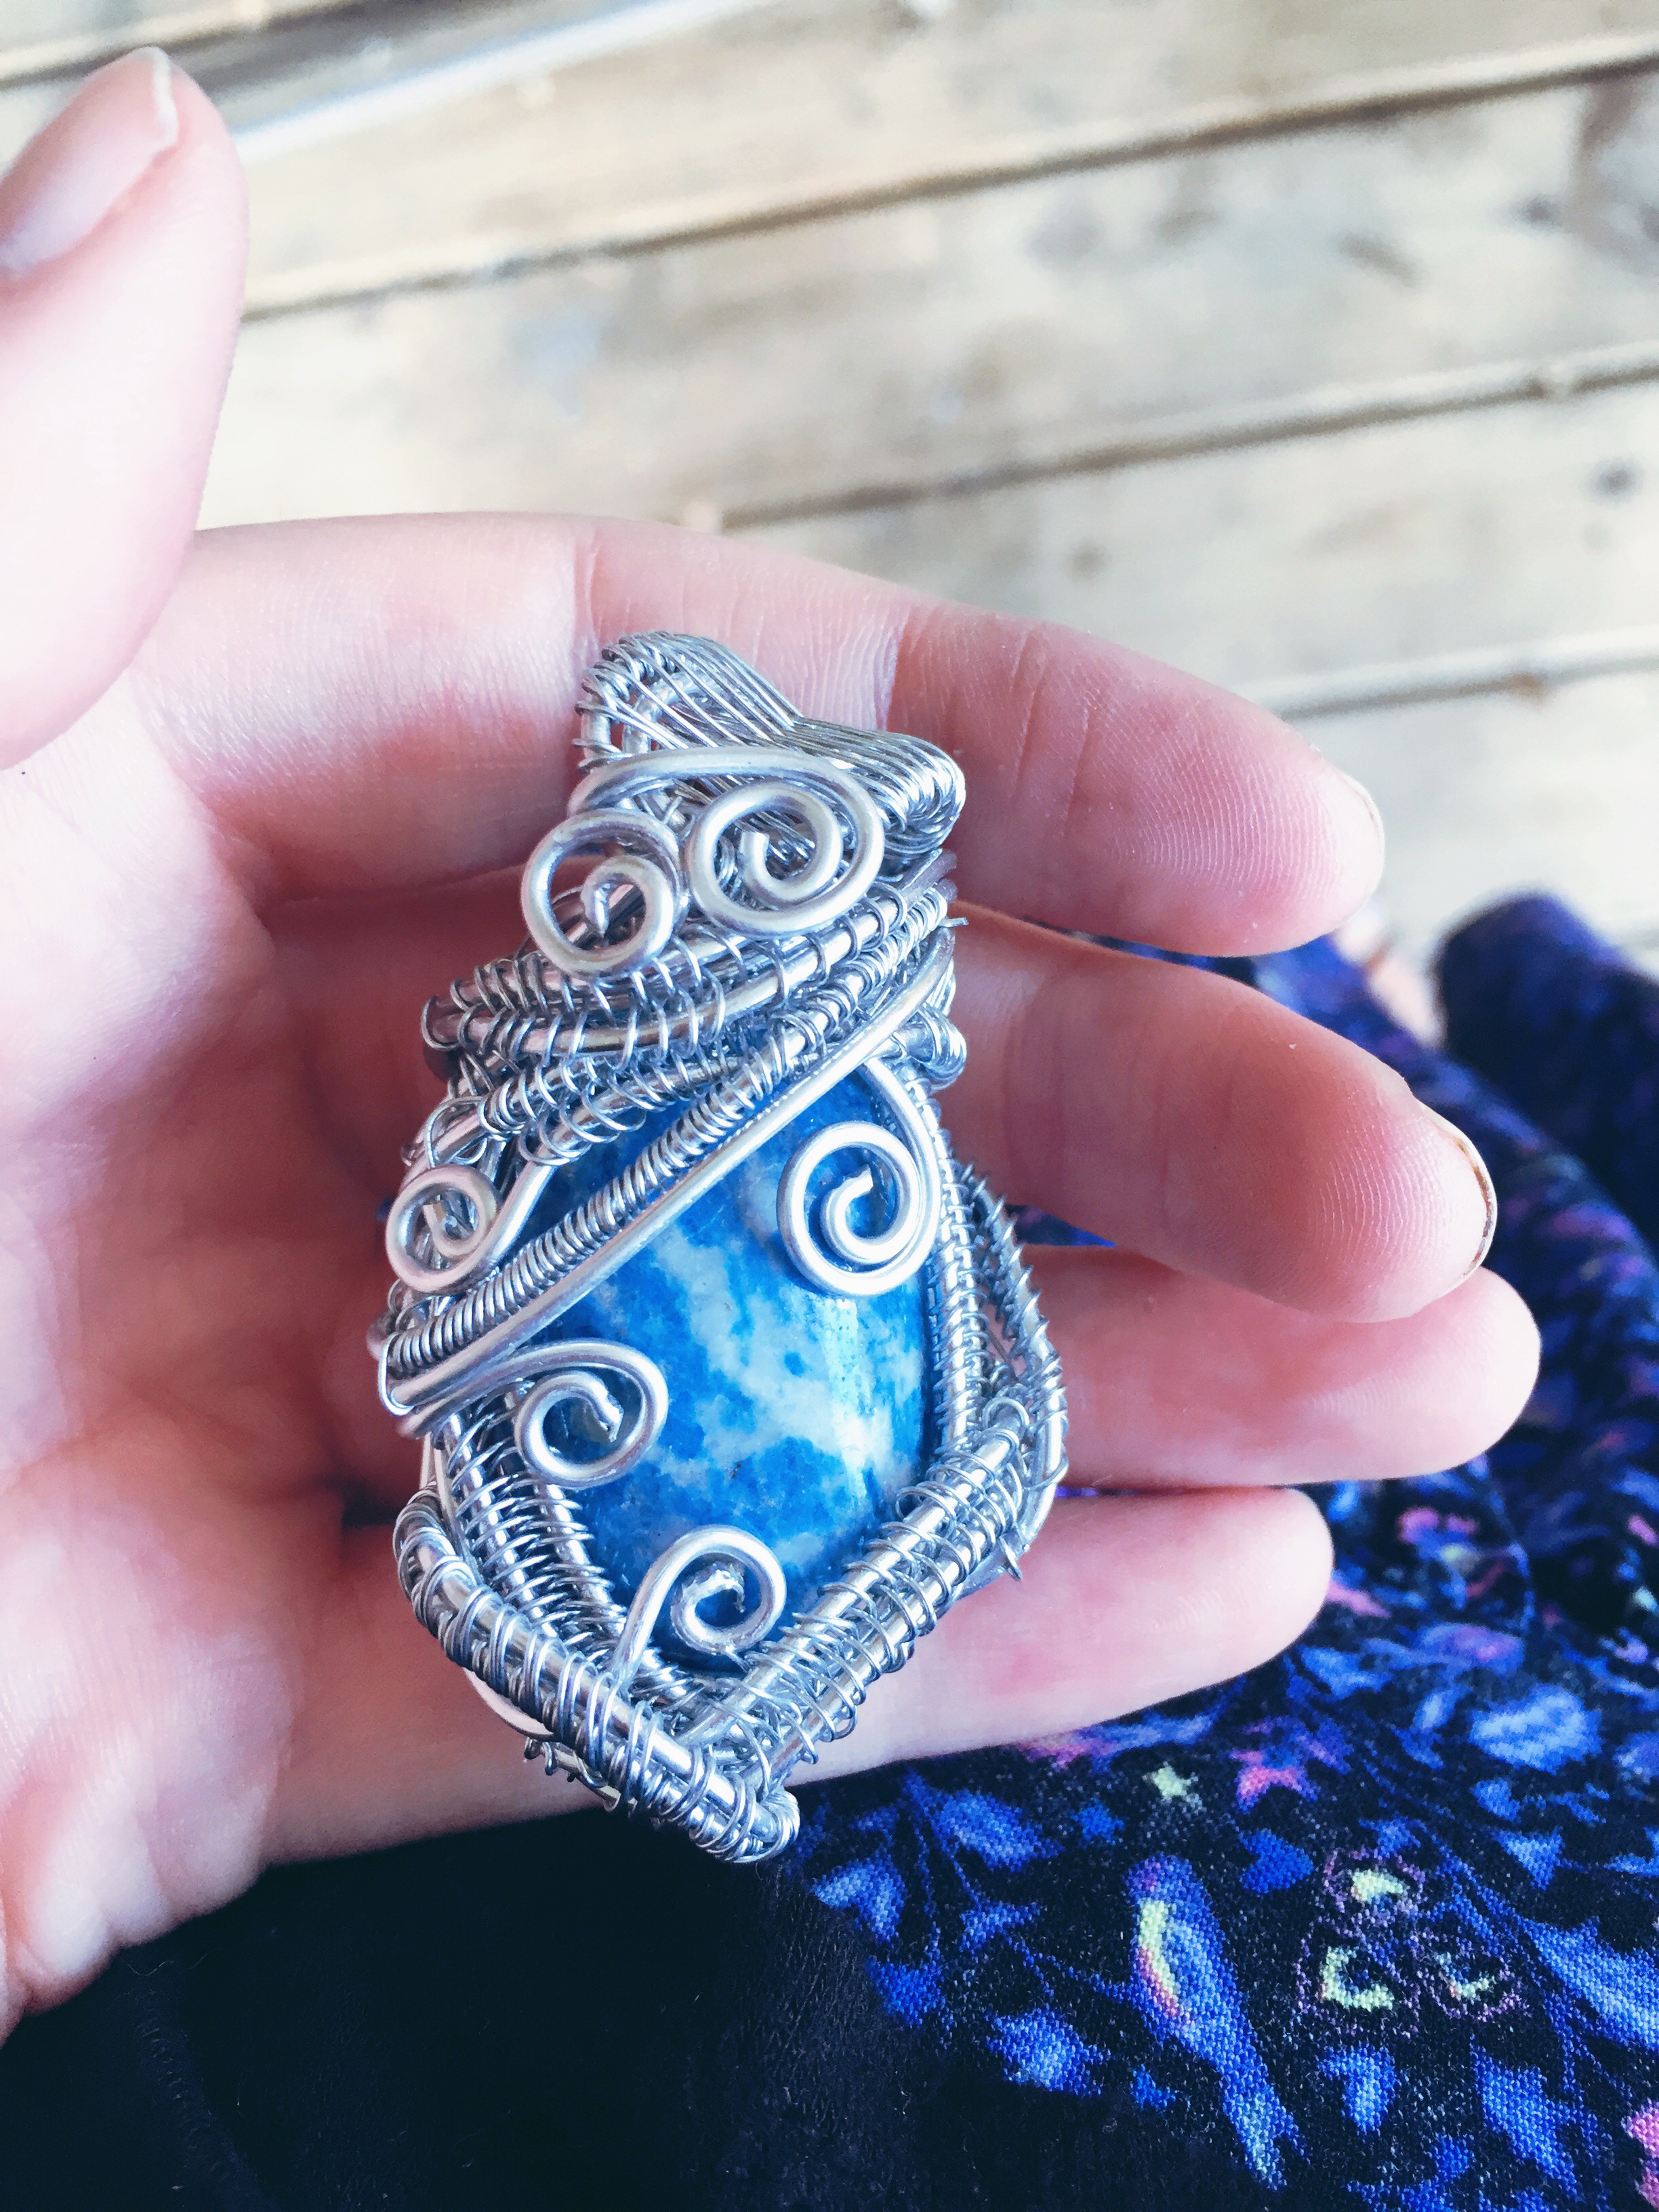
Step Eight: Continue weaving and wrapping as much as you would like. Once the stone is in place it is up to you to create the amount and type of detail you want.

To end a piece of wire, I create a swirl or tie it in the back of the loop so the loose end of the wire is not visible.
To create a swirl, use needle nose pliers at the very tip and do small bends with your wrists until you have reached the desired effect. Use wire cutters to cut any loose ends you don't need. You can use leftover thin wire still attached to weaves to hold the swirls in place.